To mount the optical camera onto ACAM_64, follow these steps:
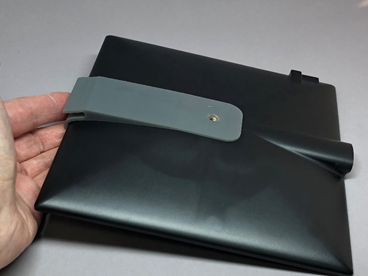
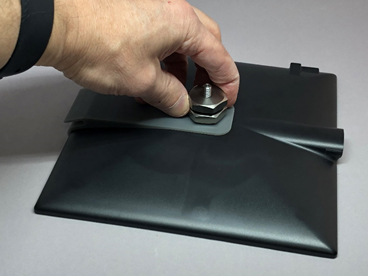
Attach the camera bracket to the back of ACAM_64, using the tablet mount threaded adapter (see Figure 1 and Figure 2). Note that the threaded adapter can still be used to attach a tablet mount if required.
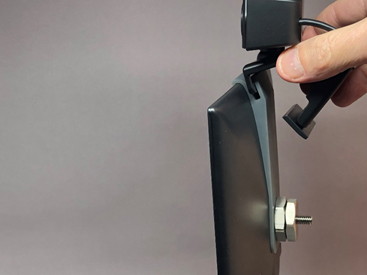
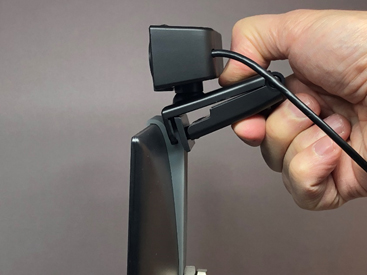
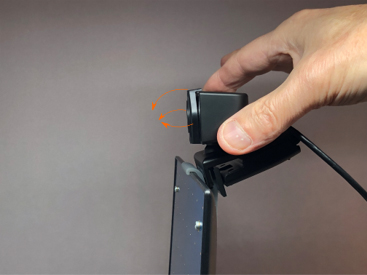
Clip the camera to the top of the mount (see Figure 3 and Figure 4). Press both panels of the camera clip to secure the camera onto the bracket.
Figure 1
Figure 2
Figure 3
Figure 4
Connecting the Optical Camera
Connect the optical camera to a USB port of the PC. The first time around wait for the PC to detect the camera and load its driver.
Go to the PC’s Settings. Make sure the PC does not use the microphone of the new camera as the default microphone for the PC. If it does so, change the default audio input device and the default communication input device back to the PC’s usual microphone.
Connect the ACAM_64 acoustic camera to another USB port on the PC. If it is the first time, wait for the driver to load and the instrument’s LED to turn green.
Start the Instrument Manager
Adjusting the Parallax
The location of the optical camera is offset from the center of the ACAM_64 microphone array. So, it is important to orient the optical camera so that the acoustic image and the optical image are aligned.
To properly align the two images, follow the instructions below:
Use a source of white noise. Many smart-phone applications can generate white noise of a controlled amplitude. For instance, Tone Generator Pro from Performance Audio. Best results are obtained with a compact white noise source of wide frequency content. Do not use a pure tone as a source, as it will be coherent with reflections on walls, ceiling and floor and create distorted images. There are also many white noise audio files that can play from various YouTube channels. It does not matter what the actual source is, as long as it is relatively compact, and the generated noise has a wide frequency content.
Place the source of white noise in front of the camera at the distance where the actual source to be imaged is expected to be. The alignment is slightly dependent on the distance from the camera, especially for measurements at close range, where the parallax error is largest.
Orient ACAM_64 towards the source so the source is clear and roughly in the middle of the acoustic image.
Tilt and turn the optical camera on its swivel, so the optical image of the source is aligned with the acoustic image (see Figure 5).
Figure 5
Specifications
Brightness
Auto
Contrast
Auto
Lens
High-quality glass lens
Connectivity
USB
Field of View
80 deg x 43 deg
Color Depth
Grayscale (Instrument Manager)
Displayed Resolution
Width: 128 pixels (Instrument Manager)
Rate of Image Capture
Up to 27 images/s
Mounting
Clips to adaptor bracket for ACAM_64
Value of an Optical Image
ACAM_64 presents acoustic images, showing sound sources in the field of view of the instrument. But it does not show an optical image, so it is difficult to match acoustic hot zones with the actual pieces of equipment creating the noise. The optical camera kit captures the scene in parallel to ACAM_64, and Instrument Manager presents the optical image superimposed onto the acoustic image. The videos below show how that optical image facilitates the interpretation of the acoustic image.
The optical image is black and white to avoid offsetting the false colors of the acoustic image. A slider adjusts the relative intensity of the optical and acoustic image, from full-optical to full-acoustic, and all degrees in between.
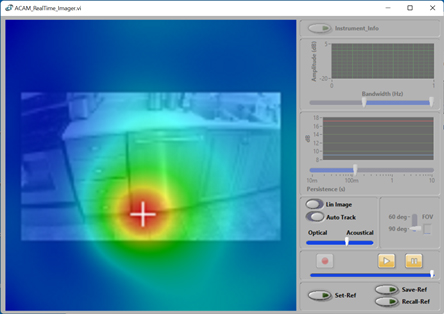
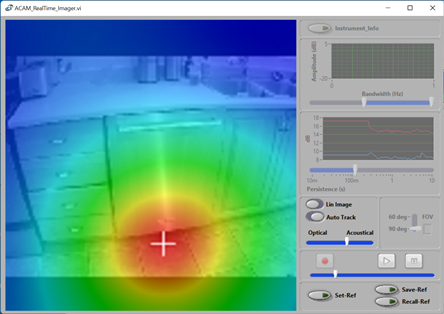
Field of View (FOV)
The field of view of the optical camera is 80 deg x 43 deg. As the field of view of ACAM_64 is adjusted, the relative size of the optical image will change accordingly:
When ACAM_64 is set at 90 deg FOV, the optical image occupies only the central portion of the acoustic image
When ACAM_64 is set at 60 deg FOV, the optical image occupies almost all the area of the acoustic image
Examples
The following files can be downloaded and played back from Instrument Manager (download links below):